
Pasteurization is a great solution for stopping yeast from being active. Sometimes the only solution to achieve this is to neutralize any living yeast cell by increasing the heat. Yeast strains can’t sustain temperatures above 140°F (60°C) so at this temperature, no yeast can survive.
In this guide, I’ll explain the best methods for homebrew pasteurization and the dangers that come with it. Although this is a truly great method and useful solution for homebrewers, it’s not to be taken for granted.
Therefore, we must be careful not to increase the temperature too high or too quickly as the yeast will already start to die off at 110°F (43°C), so it’s possible to neutralize it even with lower, but consistent temperatures.
Which brews are usually pasteurized?
| Brew | Pasteurize? |
|---|---|
| Homebrewed/craft beer | It’s never necessary to pasteurize |
| Commercial beers | Usually pasteurized to keep the beer from further conditioning on shelves and warehouses so the standard remains the same for all customers. Many famous Belgium beers and wheat beers aren’t pasteurized because yeast contributes to the experience and those beers are quickly consumed |
| Mead | Only necessary for sweet mead |
| Ciders | Only necessary when creating sweet ciders |
| Wine | Rarely pasteurized as it impacts the aging properties |
I am used to pasteurization at this point, but the stories I can tell are quite scary. I experienced lots of bottle bombs when I committed certain mistakes but hopefully, the only damage done was to the bottles and not to me or anyone around. So, please let me first say a few things about safety.
Safety first!
Pasteurization of homebrew can lead to bottle bombs, so I advise you to wear clothes that will cover your entire skin, a working set of gloves, and safety eye protection!
Of course, bottle bombs shouldn’t happen, but if it’s your first time it’s important to be extra careful.
Bottle bombs during pasteurization are more likely to happen when:
- There are high Co2 levels in bottles
- The bottle temperature is raised too quickly
- The bottle temperature is lowered too quickly
- Yeast may have survived and continued to ferment
These are the reasons for bottle bombs during pasteurization and believe me if you ever experience bottle bombs you’ll be happy to have prepared in advance.
To prepare for pasteurization do the following:
- Wear protective clothes and safety glasses (cover all skin and wear working pair of gloves)
- Pasteurize in a container with a lid (not made of glass!)
- Ideally, try to pasteurize fewer bottles at a time as this will prevent the chain reaction if one cracks, the others won’t.
Okay, now I have stated a few important tips about safety, I’ll tell you a short story about my experience with pasteurization and from other homebrewers, and then we’ll get to the point with short instructions for successful pasteurization.
Why Would You Pasteurize Homebrew?
You are back-sweetening
It’s possible to pasteurize homebrew to prevent it from fermenting again if you plan to leave fermentable sugars in the bottles (or kegs and barrels).
There’s no way to simply back sweeten a homebrew without expecting bottle bombs because the yeast will continue to feast on sugars and continue to produce Co2 and alcohol. Soon enough, there will be so much Co2 that the bottle will crack.
Pasteurization will fix this problem as when you kill yeast all remaining sugar will stay intact and you’ll have a perfectly sweet brew just as you intended.
However, this isn’t as easy to achieve as it’s to talk about it.
- You can pasteurize prior to bottling and have a flat, sweet homebrew
- You can pasteurize after the bottling and naturally carbonate homebrew and hope you kill yeast at a time before it produces too much Co2
As you can see, the first option is easy, but if you kill yeast you won’t be able to add priming sugar and carbonate it but you’ll rather have to force carbonate from the keg.
The second option means that you’ll add priming sugar + extra sugar for back sweetening, so you’ll have to have perfect timing for yeast to only eat priming sugar and leave extra sugar intact.
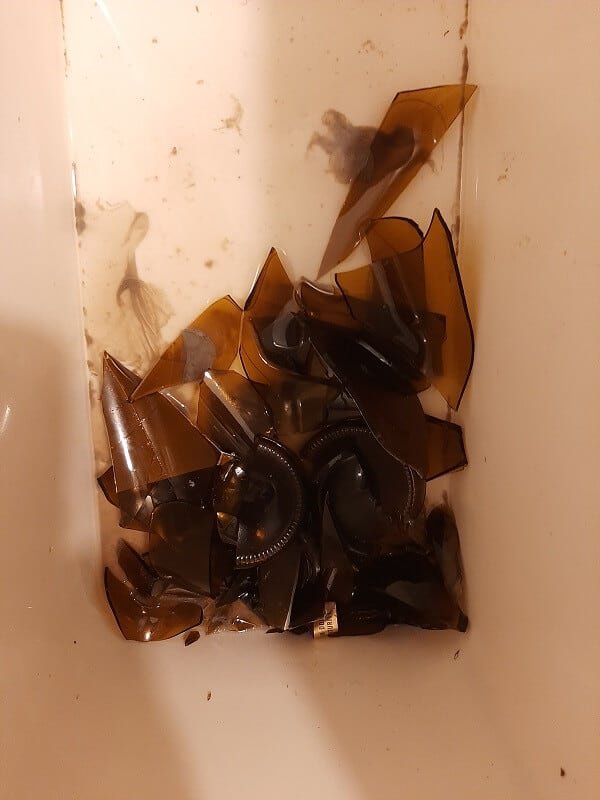
This is exactly what I tried to achieve some time ago half of my batch was ruined and I had lots of glass to deal with.
This happened due to a few reasons:
I let the bottles prime for 24-32 hours and I assume the Co2 level was already around 3.5-4.0 (Although I like my cider sparky I didn’t want that much Co2). However, the bottles can sustain only up to 5-6 Co2 volumes and if I waited another day, probably every single bottle would have exploded.
I pasteurized with relatively okay timing (but I believe I still missed the mark). Due to already decent Co2 levels in bottles, they were sensitive to heat and when the temperature raises, the Co2 expands, so I had around 6 bottle bombs straight during pasteurization. I tried to do it slowly, but when the bottles are sensitive it’s hard to time it perfectly without professional pasteurization equipment.
The other 6 bottles exploded during cooling when I left all bottles together in a container in the basement. I assume this would be even worse If I moved the bottles as even a tiny collision can crack the warm bottles full of Co2.
The rest of my batch (15 bottles) survived and were actually quite fine. So, in a way, I managed to pasteurize the cider and it was sparky and sweet but at a great cost.
You want to keep the homebrew from changing
The second reason why you might pasteurize your bottles is to stop the yeast from impacting the brew. Yeast doesn’t only produce alcohol and Co2 from available sugars but also plays a big role in conditioning.
However, I don’t think you should necessarily pasteurize your homebrew whether it’s beer, mead, cider or anything as the yeast is homebrewers best friend and it’s often responsible for brew getting better after conditioning.
Just as it’s expected to find some sediment in homebrew and craft beers, it’s also expected that the yeast will improve the quality of the brew, not ruin it.
Why are commercial beers pasteurized?
Commercial breweries almost always do this because they want the beer to get to its peak within 2 weeks or so and they don’t want it to continue to change in warehouses or on shelves.
Pasteurization makes perfect sense for breweries who care about the standard and want their beer exactly the same for every customer, every time.
If you want to pasteurize, for this reason, you can because if you only add priming sugar there won’t be high odds of bottle bombs as the Co2 buildup will always stop at the wanted level. You’ll still need to be careful with raising the temperature and chilling, but the odds of bottle bombs will be low.
How to pasteurize homebrew?
Determine when should homebrew be pasteurized
You can pasteurize before bottling or after bottling, but if you need to prime homebrew in order to carbonate it you’ll have only one option and that’s to bottle pasteurize.
Bottle pasteurization is the most common method homebrewers use and it’s not only due to priming reasons that precede it, but it’s also way easier to heat up a bottle per bottle than a big 5-gallon batch in the fermenter.
To bulk pasteurize a whole batch you’d need some serious space and the capability of maintaining large amounts of water or steam in a closed environment.
So, I’ll assume you’ll bottle pasteurize, and whatever the reason just follow the next steps.
Choose the right type of container and method
You have two options now, the first being pasteurization on a heat source like on a stove and the second being simply pouring hot water on bottles placed in a container that’s not placed directly on the heat source.
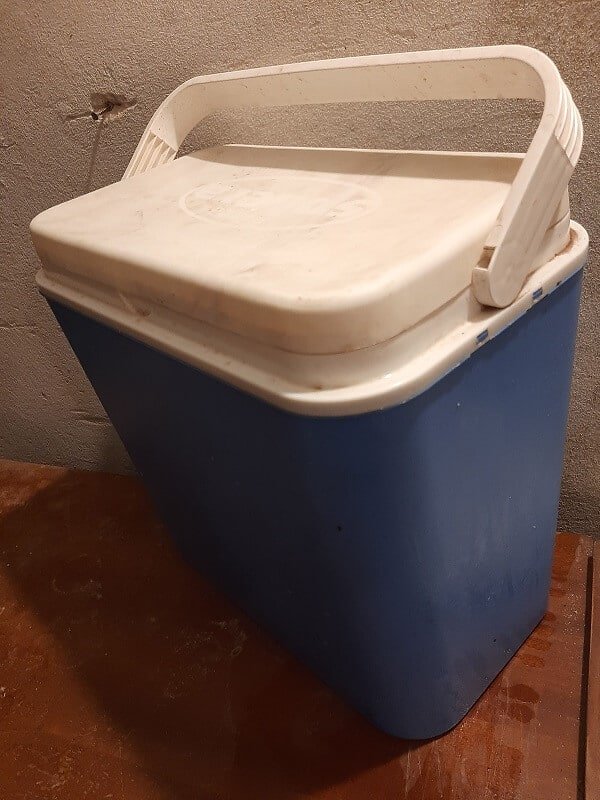
I prefer the other method because I use these insulated thermal lunch bags that trap the heat inside until I remove the lid and let the water cool.
Pasteurizing off the heat source
This is how I do pasteurization in these insulated lunch bags.
- Place bottles in
- Start with warm water (122°F (50°C))
- Top up with even warmer water (140°F (60°C) to 158°F (70°C)
- Make sure the top of each bottle is covered and place the lid on
- Wait 30 minutes
- Remove the lid and let them cool (usually overnight but it can take only a couple of hours)
- Test the success by opening a bottle and keeping the rest a safe place for a couple of days (When back-sweetening)
It’s possible to place bottles in a sink or in an open container, but it’s more difficult to keep the water temperature stable because it’s not enough to keep the bottles heated for just 5-10 minutes. Although the bottles may seem hot from the outside, it doesn’t guarantee the inside of the bottle is equally warm and thus the yeast may survive.
Moreover, it’s really smart to have a lid on just in case.
Pasteurizing on the heat source
This is very common practice homebrewers take, just bear in mind the following tips.
1. Ensure the bottles are not in direct contact with the heat source
Place bottles in a cooking bowl and cover the entire bottle so there are no dry spots, but ensure that no end of the bottle is in direct contact with the bottom of the bowl as that’s where the heat is the strongest and it may rapidly increase the temperature within a bottle and cause it to explode.
This is the most important advice and the biggest mistake homebrewers make which can result in a cracked bottle.
You can place some kind of a rack or a harder piece of cloth like a blanket in the bowl first and then put the bottles in so no direct contact is present, but alternatively, you can raise the temperature a few degrees higher to calculate for lost heat and remove the bowl from the heat source (I still prefer the first method because Co2 build up bottles are super sensitive).
2. Slowly raise the temperature
It’s important to start slow, so don’t raise the temperature too quickly, slowly approach the 122°F (50°C) and then continue to 158°F (70°C). It’s not important to go beyond this point as this temperature will already kill the yeast if you raise it too much over this point there is a higher chance of bottle bombs as neither glass nor Co2 appreciates serious heat.
Keeping the bottles at 158°F will probably kill yeast within 15 minutes, but it’s good to give it some extra time just to be sure so aim for 20-30 minutes.
3. Slowly chill bottles and don’t move them too much
Wear safety gear at this point just for peace of mind and carefully put each bottle in a safe place ideally in some container with some lid or a blanket over it. Be careful not to make an aggressive impact with the concrete when putting bottles down and let them naturally cool down.
4. Do a test
I always keep the bottles covered in a corner of the room just to be sure the yeast is truly neutralized. This is not important if you didn’t back-sweeten, but if you did and didn’t kill the yeast with pasteurization successfully you better not get surprised by a total mess in your fridge or in a room.
For this reason, it’s important to always give the bottles some extra time during pasteurization so you don’t question whether the yeast is dead or some strains might be still alive. Remember, even a small colony that survived can lead to troubles.
Does pasteurization affect the taste?
Pasteurization doesn’t affect the taste, so your homebrew will be intact but if you kill the yeast you can expect that the brew won’t change much during the conditioning phase. If this is what you wanted to achieve with pasteurization then great, but as I mentioned above pasteurization isn’t necessary unless you really know what you need it for.
In case you pasteurize open homebrew, the alcohol will evaporate at 173°F (78°C) and it will certainly change the taste, but if the brew is bottled there’s no way that even at such temperatures the alcohol could escape.