
Fermentation should be done at a steady temperature with minimum oscillations because the yeast likes a known environment.
Therefore, it is important to control the temperature for the entire fermentation duration from the pitching to the finalization when the yeast goes dormant.
To achieve this, you need to plan in advance what temperature is desired for your yeast and monitor it. In case it gets too cold or too warm, you’ll need to adjust the environment and apply some techniques that will either raise or lower the temperature within the fermenter.
How to keep the fermenter warm?
There are a few methods I use when I want to raise the temperature and keep my fermenter warm.
1. Use blankets, jackets, and towels
Out of desperate measures, you can always wrap a blanket or a towel around the fermenter or additionally cover it with a jacket.
The point here is to cover it from all sides, so the temperature stays trapped within the fermenter. When fermentation kicks in, it will naturally warm up the fermenter by up to 41°F (5°C) degrees and the idea is to keep that heat trapped by adding isolation.
Moreover, these layers will also bring the temperature up on their own, so it’s important to calculate a few additional degrees.
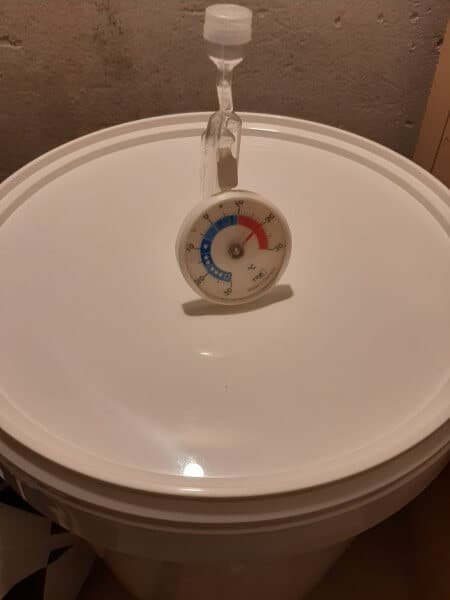
For instance, I measured the room temperature and it was 53.6°F (12°C), then I put a thermometer under the layers of blankets, and the temperature raised to 59°F (15°C). With those few degrees that the fermentation produces, you can end up with 64.4°F (18°C) fermentation temperature although the room is set at 53.6°F (12°C)
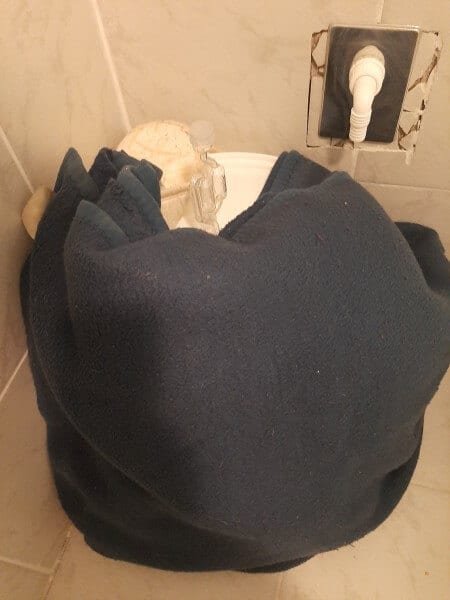
I like to first add a layer or two with a blanket, then I additionally cover it with a large jacket or another warm blanket to ensure there are multiple layers around it.
2. Place a fermenter above the ground and away from the walls
Do not forget to place your fermenter on a thick layer of a blanket or in my case, a pillow. It is important to ensure that the fermenter does not touch the ground directly nor it’s too close to the walls.
Walls and ground (especially tiles) are colder than the temperature in the room, especially during cold seasons, so if you do not do the isolation the right way, your poor fermenter will be fighting against constant waves of cold.
The same can be said for any environment with questionable isolation, so the windows may also not be the best place to fit a fermenter nearby.
3. Use brew heating belt and pads
There are affordable heating belts and pads that can be used over and over again. They do a great job at keeping the temperature high and stable for the entire duration of the fermentation process.
The belts are easy to use because all you need to do is to wrap them around a fermenter and have electricity somewhere nearby and the pads work in an identical manner except the pads don’t have to be wrapped around the fermenter.
Belts and pads are ideal for cold seasons and there are models that will allow you to adjust the temperature right to where you need it.

Here you can find a heating pad on Amazon. Simply place your fermenter on one, plug it and it will take care of your temperature control needs.
You can also find similar heating belts but they are harder to install and may not fit every fermenter volume.
Although all modern heating devices have an inbuilt safety switch against hazards, I would personally never leave these devices without monitoring because naturally, I am keen on getting paranoid about devices that generate heat when they are left without supervision.
The accidents rarely happen, but I would make sure there are no flammable objects nearby and would check it from time to time.
These devices are best used with plastic and steel fermenters because the glass may shatter when being directly heated.
However, what I found out is that if you place these devices around the thick glass, it should be okay, so perhaps all you should do is avoid placing it where it’s thin like in the middle.
4. Use heaters or place them in the living room
This advice is probably not what you were looking for, but if you have a problem with fermentation temperature during cold seasons, why not make some space in the room you reside in?
Fermenters are pretty silent and the occasional blub you hear when yeast pushes Co2 through the airlock is almost like you have a pet.
After all, yeast is a living creature. There are a dog people, cat people and then there is you, a yeast person.
Otherwise, using dedicated heaters in a fermentation-dedicated room will overwhelm you with the electricity bills, so just get a heating pad or a belt.
How to keep the fermenter cold?
It’s easy to raise the temperature, but it’s difficult to lower it and make it stay that way. For this reason, it is best to brew cold beer types like lagers during cold seasons, and warmer types like most ales during warmer seasons.
However, if it’s not an option, let’s see how people deal with this problem.
1. Use temperature tolerant yeast
Starting with the right yeast is always the best method to save yourself from troubles with temperature.
Even if the recipe strictly calls for one type of yeast, it is possible to find a similar one that will still make the brew great but it will healthy ferment at a higher temperature.
I either brew lagers during winter or stick to ales for the rest of the year, but whenever I feel insecure about the weather, I get an adaptive yeast that can sustain a drop or increase in temperature.
2. Ferment in base rooms
Base rooms are the ideal place for storing bottles of any brew, spirit, or wine. Moreover, installing a room control system is another thing people do to ensure absolute control.
Now, If you had a base room you certainly wouldn’t need me to give you an idea, so I will shut up.
3. Place a fermenter in the fridge
Fermenters can be huge, so depending on the size you may or may not be able to fit them in the fridge, yet fridges are ideal fermenting chambers for cold dependent yeasts.
You can always brew a smaller batch as a homebrewer and fit it somewhere in the fridge where the temperature will be constantly low.
I do understand that this is a problem for most people including myself, so I rarely used a fridge for this purpose, but if this is the only option you can bid in an auction for some old fridge and use it purely for homebrewing.
Moreover, you need lots of room for bottles, so perhaps investing in a fridge with enough room isn’t a silly idea at all.
I use my old fridge since I bought a new one for food groceries and stuff, but I am lucky it has plenty of room, or otherwise, I would really struggle to homebrew.
I found some great mini-fridges and fermentation chambers on Amazon which are an investment but a worthy investment indeed. Mini-fridges are an excellent storage place for bottles but some can also fit entire 8-gallon fermenters and fermentation chambers are specially made to keep the temperature low and constant during primary fermentation.
4. Use Fermenting Chamber
I can also recommend one proven option straight away which I also further reviewed in the mentioned article, the Cool Brewing Fermentation Chamber you can find here on Amazon.

These chambers are your most affordable option for temperature control, but if you also need a place which can hold bottles besides being used for fermentation and always chill the brew to the desired temperature than mini-fridges are another great choice.
Tip: Make sure the temperature is stable
It is better to be a few degrees below or above the wanted degree as long as it still fits the range under which the yeast can ferment than to have big oscillations.
Big jumps and falls in temperature are terrible for yeast because it doesn’t allow the yeast to get used to a fermenting temperature. Big differences in temperature will affect the taste, but can in some extreme cases kill your precious yeast or not allow it to reproduce healthily. You can find the list of off-tastes in a homebrew including those caused by bad fermentation in my dedicated article.
Another thing is that yeast will perform differently at a different temperature, so you won’t be able to follow the recipe and get the wanted flavors from the yeast if you do not control the temperature.
This doesn’t always end up as a bad thing, but certainly brings risk.
I remember fermenting a Columbus Smash beer in a room at 53.6°F (12°C), while the recipe strictly called for 68°F (20°C). The Safe Ale 0-5 yeast can ferment in the range of 53.6°F (12°C) to 77°F (25°C), so I knew that it won’t fail to reproduce at a lower scale.
However, the flavors produced at the lower end are different than flavors produced at a higher end of the scale, so my ale had less flowery tones and was less aleish.
After conditioning it at room temperature I tried the beer and shared it with my friends. We were surprised by how good it conditioned, and that “lagery” taste achieved by fermenting at a lower end was actually a beneficial thing.
The beer was different, but nevertheless, it ended up unique and most importantly great!