
Homebrewing is highly dependent on cleaning and sanitation protocol and doing it wrong is the major reason why homebrews fail to meet their expectations.
For the past few years, I have been brewing excellent beer and mead, or that’s at least what I’ve been told, but at the beginning, I was not consistent with cleaning and sanitizing protocol and thus I had to learn from my mistakes.
When I started to pay extra attention to cleaning and sanitizing I also realized that every single batch of homebrew is coming out just as intended. What I realized is that sometimes we overlook very important steps and forget about tiny things, yet you know what they say, the devil is in the details.
The chances are that you are, just like I used to be, overlooking those important details that cost you lots of time and energy only to end up with a vinegary, sour homebrew.
After realizing how many mistakes I’d make and seeing my fellow homebrewers committing the same mistakes, I said STOP, let’s create a cleaning and sanitation guide that will prevent those nasty germs from ever again taking all that you worked for.
What to clean and sanitize
| What you must sanitize or/and clean | Why and How? |
|---|---|
| Fermenter | Fermenters are large and everything including the lid should be cleaned and sanitized. Be careful not to scratch plastic fermenters as those cavities can house germs you won’t be able to reach with sanitizer. So, don’t use hard brushers and similar stuff. |
| Spigot | Spigots in bottling buckets or barrels can be tricky and host unseen dirt, so check them with a flashlight from different angles, use a soft toothbrush, soak them, and rinse them multiple times. |
| Bottling wand, tubing, siphon | These are hard to clean by hand, so a good cleaning solution and soaking are necessary. Don’t ignore any signs of discoloration and dirt in these. |
| Bottles and caps | It’s difficult to spot dirt in brown bottles, so use a strong light source. Don’t ignore discolorations at the bottom and clean them to perfection. You can reuse caps, but it’s not recommended. If there’s some rust on the caps don’t worry! Just sanitize them. |
| Any equipment that gets in touch with ingredients after the wort has been chilled (scissors, scalpels, muslin bags…) | It’s better to be safe than sorry, so even if something looks clean and it will have minimal contact with ingredients or wort, sanitize it! For instance, I go that far to sanitize scissors when opening the yeast pack (maybe that’s too much, but when I have the sanitizer in a nearby spray bottle why not?) |
| Top-off water or ingredients | If you add water to the fermenter to top off the quantity make sure it’s preboiled and pure. Any ingredient should also either be heated prior to being added, baked in the oven, or soaked in strong alcohol for ideally, more than 24 hours. |
| Frozen ingredients such as fruits in a later addition | Frozen ingredients are not safe as they may contain contaminants. |
| What you don’t need to sanitize | Why? |
|---|---|
| Brewing kettle, thermometer, muslin bags, brewing bags, brewing ingredients… | The brewing kettle should be clean, but it’s not necessary to sanitize it because any contaminants will die during boiling. This applies to everything that will fit in during meshing and boiling. |
| Hydrometer and graduated cylinder | You don’t have to sanitize these unless you plan to put the sample back into the fermenter (which is not recommended due to unnecessary risk for such a small sample) |
| Hops for dry hopping | Hops contain anti-bacterial properties, so no harmful contaminants live there and no heat or vodka should be used (don’t forget to clean and sanitize the muslin bag if you use it though) |
What cleaning and sanitizing products you’ll need?
In homebrewing, we absolutely need sanitizer as it’s simply not replaceable. It’s cheap and will ensure your homebrew doesn’t get contaminated. If you don’t use sanitizer you are playing with fire and there are high odds of things going in the wrong direction.
For a sanitizer, I recommend Star San Pro because it’s among the most tested and reviewed sanitizer products in the homebrewing community (or at least wherever I looked). Moreover, I have personally used Star San since the beginning, it never disappointed me and I’ll keep using it because I didn’t find anything better for the quality/price ratio.
Sanitizers kill nasty germs with could be responsible for the contamination, however, sanitizers only work when the surface is already clean from any visible dirt.
This is due to the fact that sanitizers aren’t cleaners, so they are not used for cleaning any kind of stains whether it’s grease, dried sediment, dried caramel, malt extract, or any dirt that could get on the surface. It’s important to remove any visible dirt before applying sanitizer because the germs could be protected by layers of dirt and then sanitizer won’t exterminate them.
You can use a dish detergent for cleaning the surface, but there are also cleaning solutions made just for homebrewers that will remove even the hardest, most consistent stains.
It’s possible to use a detergent or even baking soda and have success with most stains, but sometimes (and this especially refers to used bottles and tubings) it’s difficult to remove hardcore stains, and having that extra help from the special homebrewing cleaning solution is helpful.
At the end of the day, homebrewing cleaning solutions aren’t expensive either, so it’s worth buying some, so you are at a piece of your mind.
I recommend ChemiPro OXI because once again, I have seen good results with it and I clean with it everything from bottles to kegs and barrels (and kegs and barrels can be difficult to clean otherwise because it’s hard to reach in with the hand, so it’s important that the soaking does the job).
How much sanitizer do you need?
You’ll put 6 ml of sanitizer in 1 gallon of water. This is the measure I use with Star San Pro, but I think that most sanitizers (if not all) follow a similar ratio. Anyways, just to be sure check what the instructions on the back of the bottle say.
It’s always better to put a few extra droplets of sanitizer than less if you are not sure.
I find 1 gallon just enough, but if you have a bigger, wider container you may need more. It’s important to be able to soak the bottle in it, but you don’t need too much of it as you will be returning the solution from the bottles back into the container.
Do you need to rinse after sanitizing?
You don’t have to rinse after sanitizing or cleaning with homebrewing sanitizer/cleaning solutions. Homebrewing sanitizers and cleaners are food-grade-safe, so they are not dangerous to humans or pets when diluted with water.
For some reason, it’s written on the back of the cleaner solution products that you don’t have to rinse, but if you use it for removing dirt the only logical next step is to rinse it to wash the dirt off.
Moreover, I recommend that you rinse after cleaning even if there is no visible dirt because after cleaning you’ll want to sanitize, and in that case, It’s important not to mix the sanitizer (low PH) with cleaner (high PH).
You could let the surface dry instead of rinsing but there’s no point in wasting time so rinse after cleaning, then sanitize, and DO NOT RINSE AFTER SANITIZING.
It’s important not to rinse after sanitizing because it will negate the purpose of sanitizers. The chances are that if you rinse (unless it’s commercially bottled, contamination-free water) you will accidentally introduce unwanted contaminants that were in the water (especially tap water) on the surface again.
Useful gadgets for cleaning and sanitizing
Bottlebrush
Bottlebrushes are a useful homebrewer’s gadget that will make your day easier if you reuse bottles. It’s difficult to reach inside the bottle without a brush and sometimes it’s difficult to remove the stains without physical contact even after overnight soaking.
Alternatively, there are cleaning tricks such as using rice and shaking the bottle because the rice will make physical contact with the stains and hopefully remove them, but it’s a messy, energy-consuming, and unreliable method for removing stains.
Therefore, get a bottle brush that can fit in the bottle (it’s important to find a brush that can actually fit through the bottleneck) and have it in your homebrewing stash.
Spray Bottles
Spray bottles are a useful gadget to have by hand because you can fill them with sanitizer solution and use it to ensure the small areas are sanitized at all times.
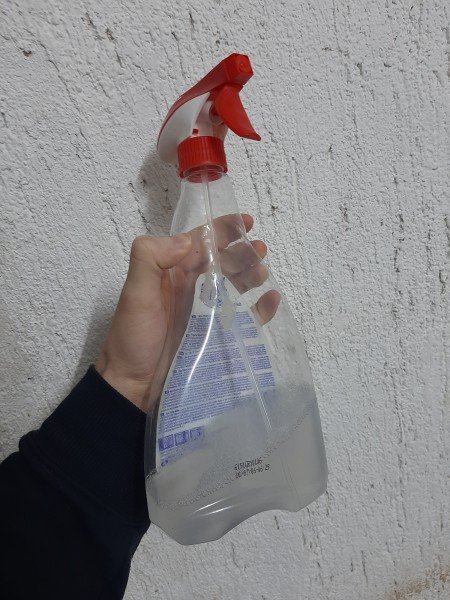
Just spray a few times and continue with your homebrewing tasks.
Sometimes you’ll need scissors to open the yeast package, reattach the bottling tube into the spigot, pick the fallen cap from the floor or you’ll want to reach inside the spigot once it’s installed and a few quick sprays from the bottle will be a tool you’ll want because everything that gets in contact with homebrew must be sanitized at all times without exceptions.
I am sure you have some empty bottle sprayers at home from used window cleaner products.
How to clean homebrew tubing
Tubings are among the most difficult parts of homebrewing gear to clean alongside siphons and perhaps bottling wands. The problem with tubings is that it’s impossible to reach the inside walls with a hairbrush and you must internally dissolve all dirt and rinse it out.
My recommendation for cleaning any tubing, siphon, or bottling wand is a dedicated home brewing cleaner like ChemiPro because such cleaners are specially made to degrade the dirt and make it easy to remove even without brushing. Other common detergents often lack that extra power for removing the common homebrewing steins.
After all, this is how kegs and barrels are cleaned because it’s difficult to reach inside manually to remove the dirt from the walls or cavities.
Dissolve ChemiPro in warm water and let the homebrewing gear soak for some time. Usually, 5 minutes is enough with the ChemiPro but if you are using something else read the description and soak for longer if necessary. Following the same principle, if you have to soak for an hour in warm water because the dirt is not going off, remain patient because these cleaners accumulate in effectiveness over time.
When you see the dirt is going off you should rinse to flush it out and then sanitize it with something like StarSan when you plan to use it for homebrewing purposes.
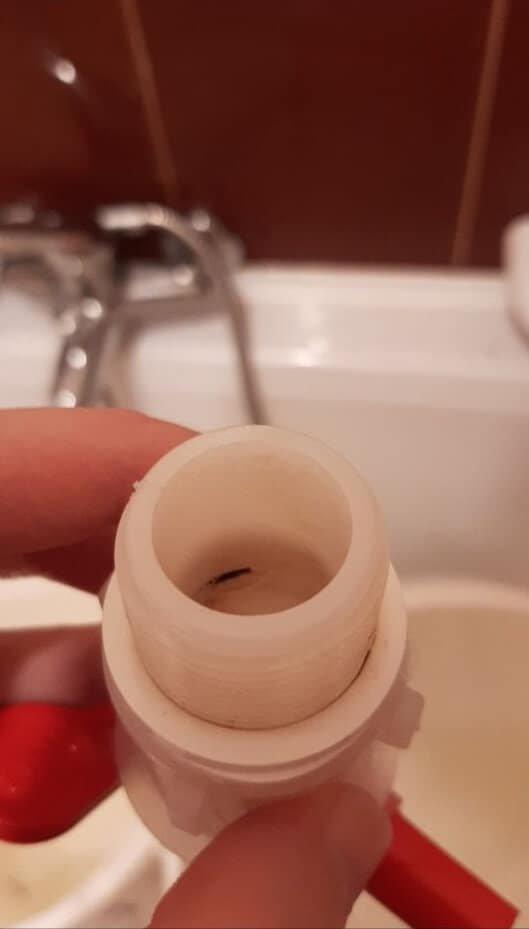
How to clean spigots
Spigots just like any other small but crucial part of homebrewing gear can be hard to reach and sometimes neglected by homebrewers. This is exactly how mistakes happen because that tiny dot of dirt inside the spigot you couldn’t reach could be the reason for contamination.
I use bottling buckets even for fermenters because I find them useful when it comes to the bottling stage. After all, a bottling bucket is just a fermenter with a spigot installed at the bottom.
Whether you use bottling buckets as a fermenter or rack from the fermenter to the bottling bucket for the purpose of bottling after fermentation is complete, you’ll have to double check there’s no dirt somewhere in the spigot or around it.
Spigots are composed of multiple parts and they are installed in the wall so there’s room for sediment and dirt to find a way deep inside where you can’t easily see nor reach or at the place where you screw the spigot into the hole in the wall.
It’s best to rinse the spigot with warm water straight after use before you put it into storage, but if you forgot to do it or there’s still dirt in it follow the procedure.
- Remove the spigot completely by screwing it off
- Soak the spigot in the hot water mixed with cleaning detergent for 5-20 minutes (the longer the better for hardcore stains)
- Take a toothbrush or a toothpick reach inside the spigot and remove the visible dirt
- Rinse and double-check check is there more dirt (even the small visible stains are a problem and must be cleaned off)
How to clean and sanitize bottles
Used bottles are the devil’s work and you’ll have to be extra careful when reusing bottles. It’s best to clean used bottles straight after they have been emptied because the longer the sediment remains at the bottom and the inner walls, the longer it has to dry out and become sticky.
I have covered the topic of reusing bottles in my dedicated article, so if you are reusing bottles you’ll find a few good ways to successfully clean them.
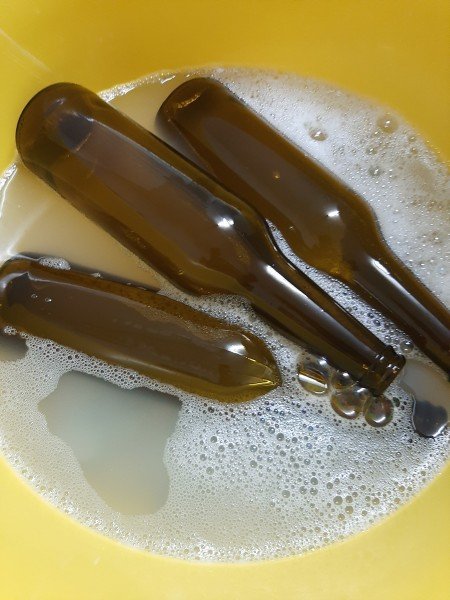
Either way, it’s important to make the bottles pitch clear perfectly. Strange discolorations and light stains at the bottom are a risk you don’t need to take.
Clean the bottles multiple times if needed and check each one manually by putting it against the strong light source because this will illuminate any strange discolorations and light stains you couldn’t spot in the darkness (especially if you use brown bottles).
For this reason, cleaning solutions like ChemiPro will help you clean bottles every time and you’ll only have to sanitize them afterward before you are ready for bottling.
Can you store sanitizer solution for next time?
It’s possible to store sanitizer solution for next time if you can store it properly. I use StarSan and rarely reuse it because it’s easier to prepare a fresh solution each time than to worry about it going bad over time and needing to store it at some place.
If you want to re-use StarSan (but the general tips apply to all sanitizers) check my short article on re-using StarSan in which I explained what you need to do to preserve it and how to know whether it’s still fresh or not.
It’s important to know what you are doing because an oxidated, old sanitizer will lose its acidic properties which must be below 3 on the PH scale and then it no longer works.
Can you use bleach for homebrewing purposes?
It’s possible to use bleach if the dirt is not going down, but be careful with the bleach as it’s dangerous for the living. I don’t use nor recommend it; it can even degrade plastics because it’s corrosive, so I advise staying away from the bleach.
If you must use bleach, use just a droplet of bleach in a small amount of warm water and let the equipment sink in for no more than 15 minutes. Rinse it at least 10 times with warm water and let it dry for quite some time before sanitizing it.
Moreover, I wouldn’t do this with bottles and I strongly recommend that you don’t do it either! Just forget about the bleach.