
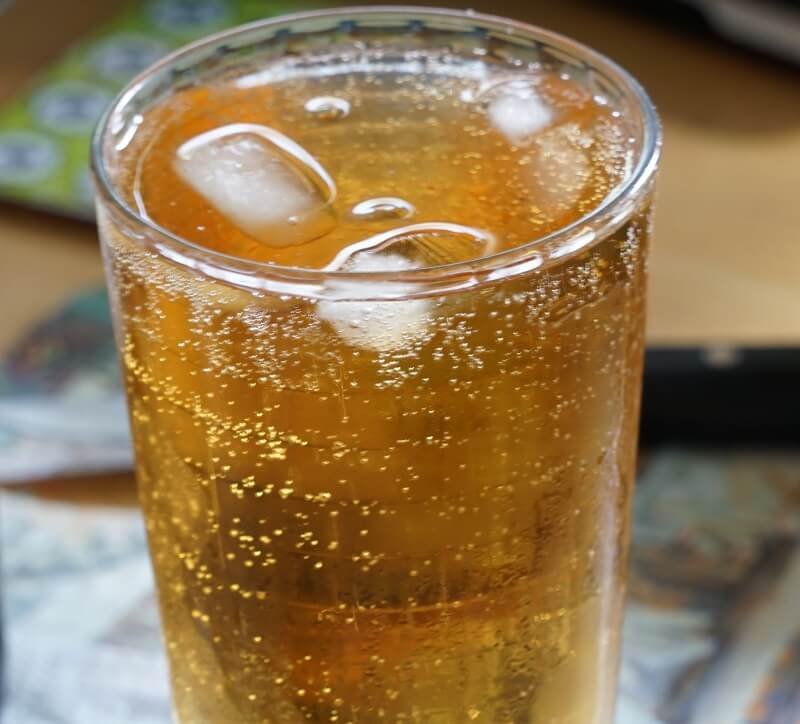
Some ciders may be enjoyable flat and dry, but nothing beats a good, sweet, and sparky hard cider.
Commercial breweries can easily create a sweet and carbonated cider straight after fermentation, but such a task isn’t as easy for people who make ciders at home.
Sweet and sparky cider is my favorite, so I have a few options for you if you want to create both a sweet and carbonated cider at the same time all at home.
Why is it hard to make a sweet, carbonated cider?
When ciders ferment, the yeast has eaten all available sugars and then it went dormant.
As you can see, the yeast didn’t magically disappear from the cider just because it became inactive, so next time you add sugars it will reactivate.
Thus, the yeast will feast once more and continue to produce Co2 and alcohol in your cider.
This is a problem because all sugar you added won’t remain as such, and a huge amount of newly built Co2 could easily cause a bottle bomb because Co2 won’t be able to escape the bottle.
So, forget about adding any sugar before you are certain you can take care of the yeast.
On other hand, if you like your cider dry and sparky, that’s way easier to accomplish as all you’ll need to do is add a tiny amount of priming sugar after fermentation is complete and prior to bottling.
Now if you still want a sweet, sparky cider let’s see what you must do.
1. Option (realistic, but needs practice)
Ferment – put priming sugar in + extra sugar for back sweetening – bottle – monitor Co2 level – pasteurize
This is the easy-on-paper method, but a chaotic mess in reality.
The idea is to put all sugars in and bottle, so the yeast will reactivate and then you monitor the Co2 level and when it gets to the desired level which is 3.0-4.0 for ciders, you pasteurize to kill the yeast.
This would be ideal if only it was easy to score the timing on point and you had a pasteurization machine.
This way, you must guess that Co2 levels reach the desired volume but don’t go over it as otherwise, you’ll have a gushy, over-carbonated mess.
This is achievable if you are really good at paying attention and not busy with other stuff in life as this can’t be delayed, it’s now or it’s too late.
Tip: you can use a plastic PET bottle to monitor Co2 levels as it will harden on touch when Co2 levels are high. Although, this is not a surgeon-precise technique neither, but a good tool neverethless. If the bottle becomes nearly hard as a stone it's somewhere close to 4.0. If the bottle can no longer stand because the bottom starts to deform, oh God.. it's probably over 4.0.
You can also sacrifice one bottle and try it to be sure it’s at the correct Co2 level before pasteurization. It’s going to be delicious as ciders don’t need aging to be good, just refrigerate it.
Now you are ready to pasteurize all bottles because if you do this correctly everything will be perfect!
However, if you fail to pasteurize, the bottles will certainly explode as the amount of sugar you put in is enough sugar for the yeast to feast on for weeks if the yeast is still active.
To pasteurize your bottles you can follow my homebrew pasteurization guide.
I have described everything you must know regarding pasteurization there, so it’s better to check the whole guide than to give you a short, undetailed explanation here.
2. Option (for truly dedicated cider makers)
You add so much juice to your cider that when the fermentation ends, the yeast gets stunned like a drunk man.
Every yeast has alcohol tolerance, so the yeast will ferment sugars to a certain ABV % and then stop.
Yeasts used for beers such as ale and lager yeast strains rarely go above 10%, while champaign and wine yeasts can go up to 18%.
You are likely using champagne or wine yeast, but whether it’s the case or it’s some special cider yeast or even ale yeast, all you have to do is to look at what alcohol tolerance your yeast has.
The next step is to cap that tolerance with extra sugar so you’ll be adding enough to achieve that ABV % and then the surplus will be used for sweetening. You can calculate this by comparing the Original gravity with the final expected gravity for the yeast used.
The disadvantage of this is a really high ABV cider and you won’t be able to carbonate it without a keg so easily.
All yeast is now stunned, so there’s not much difference as if you were to pasteurize it prior to bottling. The yeast can’t eat extra sugars to prime your cider, so you need to use a keg and Co2 equipment.
Well, that’s logical but there’s actually a way to go around this which I’d only recommend to the bravest lunatics who like to play with the fire!
You’d have to wait until the fermentation is 12-24 hours away from completion, and prematurely bottle.
This way the yeast will absorb the sugars it can to reach the alcohol tolerance and if you bottle just before it finished it means you’ll trap some Co2 in the bottle too. The cider will then be highly alcoholic, but sparky and sweet.
However, this is hard to execute as there are so many variables that affect how quickly the yeast it’s sugars, you’d need to be taking many gravity reading checks and you’d need to predict it perfectly to score the desired Co2 level as otherwise, it could end up under-carbonated or over-carbonated.
3. Option (recommended and easy)
Finally, this is my recommended option which is in my opinion the easiest way to back-sweeten and carbonate cider at the same time.
You’ll do everything as usual meaning (Put the juice in and pitch the yeast) + (add extra unfermentable sugar such as Lactose).
When fermentation finishes, all sugar from the fruit juice will ferment as usual but the unfermentable sugar won’t be touched by the yeast and the cider will be sweet!
This is ideal because you can add unfermentable sugar whenever you want, so perhaps you can add all unfermentable sugar after the fermentation is complete so it’s easier for you to determine how much sugar should you put in.
Once you figure out the right amount of unfermentable sugar you can add it next time straight in the primary fermentation.
Now, all you have to do is to use some priming sugar and bottle, that’s it.
Your hard cider will be lovely sweet and sparky just as you wanted!
Best back sweetener for cider
| Back Sweetening Option | Amount Needed per 5 Gallon of Cider |
|---|---|
| Brown Sugar | 20 oz (560 g) |
| Honey | 20 oz (560 g) |
| Concentrated canned juice (apple) | 2-3 cans (350 g is one can) |
| Xylitol | 1.7-3.5 (50-100 g) |
| Stevia | 1.7 oz (50 g) |
| Lactose | 20 oz (560 g) |
I personally don’t like super-sweet ciders but enjoy them when they are moderately sweet. Our perceptions may differ, so you may want to put more or less of the suggested amount per gallon.
Lactose is my favorite non-fermentable sugar sweetener I use for homebrewing purposes. It doesn’t affect the taste but makes the brews sweeter and creamier. The only problem is that some people are allergic to lactose, unfortunately.
Stevia is a non-fermentable sweetener, as it is a plant-based extract that is not a sugar, Xylitol is also a non-fermentable sweetener I hear people have success with.
I don’t recommend artificial sweeteners such as stevia or xylitol as they can leave an aftertaste and if you use them be careful as xylitol is toxic to dogs and cats and can be fatal.
Brown sugar, honey, and juice concentrate all contain fermentable sugars that can potentially restart fermentation if added to fermented cider but won’t leave a bad aftertaste.
Conclusion
Just as it’s the case with every brew, it’s easy to make it dry and sparky, but making it both sweet and sparky is always a challenge.
If you plan to take the hobby to the next level I recommend that you at least make research on kegging equipment as it’s possible to force carbonate which opens new options.
I hope you’ll find one of the options I mentioned in this article useful and make a delicious cider suited to your taste!